Vibe Coding: Talk to an LLM
🎬 Video
This is the final step of the trail. You are going to connect your app to an AI language model running in Azure - the same kind of model that powers GitHub Copilot and ChatGPT. Once it is wired up, you can ask Copilot to add any AI feature you can imagine: summarise your decisions, suggest what you might have missed, spot patterns across a list, answer questions about your data.
The backend you added in the previous chapter is already in place, so this step is mostly about provisioning the Azure OpenAI resource and choosing which model to deploy.
What you are adding
| What | What it does |
|---|---|
| Azure OpenAI resource | A dedicated AI service in your resource group |
| Model deployment | The specific language model (for example GPT-4.1) that your app will call |
| Chat API endpoint | A /api/chat function in your backend that the frontend can talk to |
Cost
Azure OpenAI charges per token - meaning per word (roughly) sent to and received from the model. There is no fixed monthly fee for the resource itself, but every call your app makes to the model is billed.
As a rough guide, 100 typical conversations with GPT-4.1 cost around €0.20. Costs scale with usage - if nobody is using the app, the cost is zero. You can monitor your spend in the Azure portal exactly as described in the prerequisites.
Before it creates anything, Copilot will ask you to confirm you accept the per-token cost.
What the skill is going to do
The vibe-add-llm skill handles the full setup. Specifically it will:
- Create an Azure OpenAI resource in your resource group
- Show you the list of available models and let you pick one
- Deploy your chosen model
- Wire the endpoint and authentication into your backend
- Add a
/api/chatstarter function so your app can call the model
Before you start - one thing to think about
You will be asked to pick a model from a list. For this trail, GPT-4.1 is a good choice - it is capable, cost-effective, and generally available. If you see a model marked [Preview], be aware it may require additional access approval from Microsoft.
Steps
1. Open Copilot in agent mode
In VS Code, open the Copilot chat panel. Make sure it is set to Agent mode and select Claude Sonnet 4.6 from the model picker.
Tell Copilot you want to add AI:
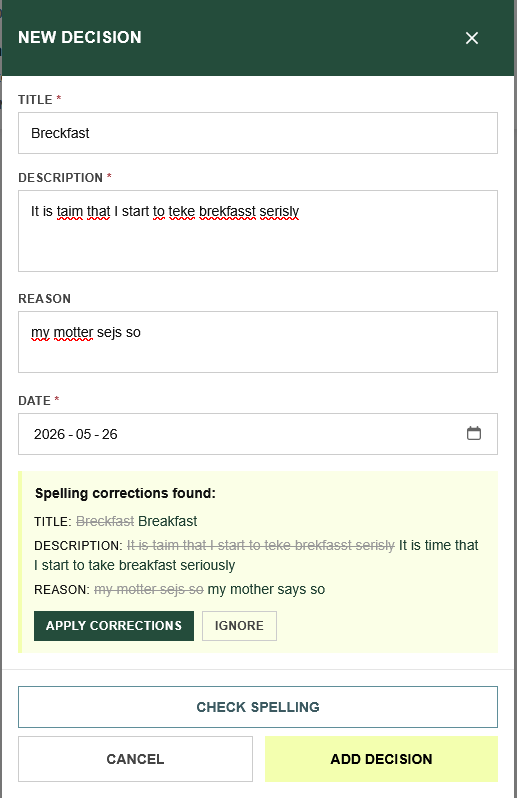
"I want to use a LLM to check for spelling errors in the add decision dialog"
2. Confirm the cost
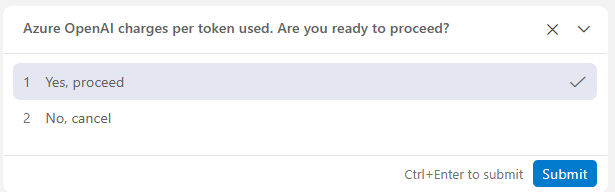
Copilot will warn you about per-token billing before doing anything. Read the message and confirm you want to proceed.
3. Choose a model
Copilot will fetch the list of models available in your region and show you a multi-select picker. Select the model you want to deploy. GPT-4.1 is recommended for this trail.
If you see
[Preview]next to a model, it may require prior access approval from Microsoft. Stick with[GA](generally available) models to avoid any delays.
4. Watch it provision
Copilot will now:
- Create the Azure OpenAI resource (about 30 seconds)
- Deploy your chosen model (1-2 minutes per model)
- Grant your developer identity access so you can test locally
- Add the
/api/chatfunction to your backend - Wire the endpoint into your app configuration
Local development and role assignment. Step 3 above tries to grant your signed-in Azure identity the
Cognitive Services OpenAI Userrole on the new resource. This requiresOwnerorUser Access Administratorpermissions on the resource group. If you do not have those permissions, the role assignment will fail silently and local AI calls will not work - you will get authentication errors when runningnpm run dev:api. The deployed app is not affected because it uses an API key stored in Azure app settings. If you want local dev to work, ask your Azure admin to grant you theCognitive Services OpenAI Userrole on the Azure OpenAI resource after it is created.
5. Ask Copilot to add an AI feature
With the model wired up, you can now ask Copilot to add any AI-powered feature to your Decision Log. For example:
"Add a button to each decision that asks the AI to suggest what risks or consequences might have been overlooked."
Or:
"Add a summary panel that uses the AI to give me a brief overview of all my decisions."
Describe what you want in plain language - Copilot knows how to call the /api/chat endpoint and wire it into the UI.
6. Push to GitHub
When you are happy with the result, push to deploy:
"Looks good - please push to GitHub."
The GitHub Actions workflow will run and your live app will have AI features.
What just happened
Your app is now connected to a real language model. The AI runs in Azure, in your own resource group, billed to your subscription. The model never sees data it is not sent - privacy is controlled entirely by what your app chooses to include in each request.
| What | Where |
|---|---|
| Azure OpenAI resource | Your resource group in the Azure portal |
| Model deployment | Visible under "Model deployments" in Azure OpenAI Studio |
| Chat endpoint | api/src/functions/chat.ts |
| Cost | Per token - roughly €0.20 per 100 conversations with GPT-4.1 |
Congratulations
You have completed the vibe coding trail. Starting from a blank repository, you have built and deployed a real web application with authentication, a persistent database, and AI features - without writing a single line of code from scratch.
What you built is a starting point, not a finished product. Every part of it can be extended, restyled, or replaced. The skills you used here work just as well for your next app idea.