Installation instructions
Installations
To be able to use GitHub Copilot efficiently, you will need a code editor and some programming languages. You will also benefit from having Git, which is a version handling tool. Because it sometimes takes a little while to get approval for installations.
We are aware that there are a lot of installations required. We are working on setting up an installation package that covers everything in the Application Kiosk.
In the bottom of this page is a checklist to ensure that everything is working.
What to Install - Quick Overview
| Priority | Tool | Purpose |
|---|---|---|
| 🔴Essential | VS Code | Your code editor - everything runs here |
| 🔴Essential | GitHub Copilot (via Application Kiosk) | The AI assistant - request approval ASAP as it needs manager sign-off |
| 🟡Recommended | Git | Version control - save and restore your work |
| 🟡Recommended | Python | Most widely used scripting language; also required by many MCP tools |
| 🟡Recommended | Node.js | Required for JavaScript-based tools and many MCP servers |
| ⚪Optional | GitHub CLI (gh) |
Only needed if you plan to publish websites to GitHub |
| ⚪Optional | Azure CLI (az) |
Only needed if you plan to deploy to Azure |
Installing GitHub Copilot and VS Code
GitHub Copilot is available as an extension for Visual Studio Code. VS Code can be downloaded for free from the internet, while GitHub Copilot requires a licence that must be requested through the Application Kiosk.
- Download and install VS Code:
- Go to https://code.visualstudio.com/
- Click the Download for Windows button to download the installer
- Run the installer and follow the default settings
- It is recommended to check "Add to PATH" during installation so you can open VS Code from the terminal
-
Admin rights: VS Code requires admin rights to install - launching the installer should trigger a ServiceNow request automatically
-
Request GitHub Copilot from the AFRY Application Kiosk:
-
Visit the application portal page
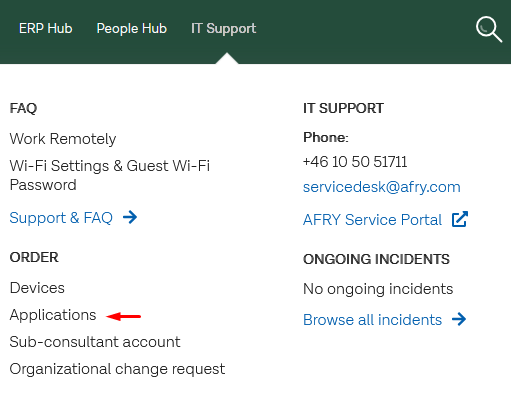
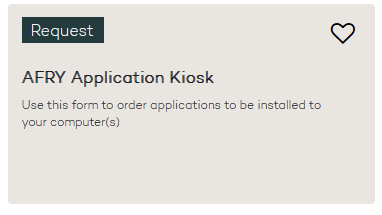
-
Click on the AFRY application kiosk box
-
Search and select GitHub Copilot
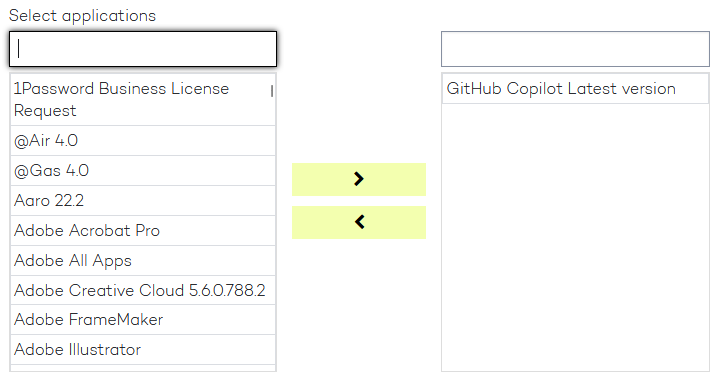
-
GitHub Copilot needs manager approval - wait for approval before continuing
-
Sign into GitHub Copilot:
- Open Visual Studio Code
-
Click the small white Github Copilot icon in the bottom right corner.
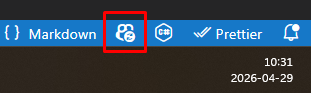
-
Click Use AI features
- Your browser will open for authentication
- Your GitHub Enterprise username is in the email you received when registering (the user name is derived from your AFRY email)
-
When you enter the user name the password field will be disabled (ensure there is no whitespace at the end of the username). In the next screen you are taken to AFRY's login page.
-
Validate GitHub Enterprise Account:
-
Click the small chat icon at the very top of VS Code to open Copilot Chat

-
Type a simple question (e.g., "How do I create a Python function?") to verify the chat is working
- Check your account status: Click the GitHub Copilot icon in the bottom status bar
-
It should show as Active or Enabled
-
Check available AI models:
- In the Copilot Chat window, click on the Auto drop down.
-
Ensure you have access to premium models (Claude Sonnet 4.6, GPT-5.4, etc.)
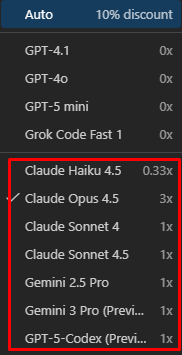
-
If you only see free/limited models, your account may not be fully activated
Git
Git is a version handling program that allows you to collaborate with others, but also to manage your own work. With Git you can
- Store the code and resources for your projects centrally (in Github for example), so that you and others can access them from any computer
- Work on your own computer with versions - giving you restore points when things spiral out of control
Do I have it?
To check, you need to open a terminal. Press Win + X and select Windows Terminal or PowerShell. Alternatively, press Win + R, type powershell, and press Enter.
In the terminal window, type the following command and press Enter:
If you see a version number (e.g., git version 2.43.0.windows.1), Git is already installed. If the command is not recognized, you need to install it.
How do I install it?
Download the Windows installer from https://git-scm.com/install/windows
You need admin rights to install Git, but launching the installer should trigger ServiceNow to give you permission. Use the default settings during installation.
Did the installation work?
After installation, close and reopen your terminal (important - the old terminal won't see the new installation). Then run:
You should see the version number. You can also configure your identity (used for commits):
Python
Python is a scripting programming language which is very powerful for data processing, although there are libraries for doing almost anything. Many MCP tools are created with Python, so you should install it even if you have other language preferences.
Do I have it?
Open a terminal (press Win + X and select Windows Terminal or PowerShell) and run:
If you see a version number (e.g., Python 3.11.5), Python is already installed. If the command is not recognized or opens the Microsoft Store, you need to install it.
How do I install it?
Download an installer from https://www.python.org/downloads/ by clicking 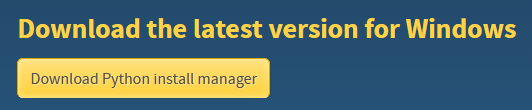
Important: During installation, check the box "Add Python to PATH" on the first screen.
Note: If you plan on working with neural networks, to fine-tune language models or do other type of work with PyTorch/TensorFlow, you should choose Python v3.10 or v3.11.
Did the installation work?
After installation, close and reopen your terminal, then run:
Both commands should return version numbers. You can also test Python by running:
NodeJS
Node.js is a JavaScript runtime that allows you to run JavaScript outside of a web browser. Even if you do not plan to create websites, having NodeJS is still useful. Many tools (MCP) are distributed as packages which require NodeJS.
Do I have it?
Open a terminal (press Win + X and select Windows Terminal or PowerShell) and run:
If you see version numbers for both (e.g., v20.10.0 and 10.2.3), Node.js is already installed. If the commands are not recognized, you need to install it.
How do I install it?
Download the Windows Installer msi from https://nodejs.org/en/download

Use the default settings during installation. The installer includes npm (Node Package Manager).
Did the installation work?
After installation, close and reopen your terminal, then run:
Both commands should return version numbers. You can also test Node.js by running:
GitHub CLI (GH CLI)
Note: GH CLI is only needed if you plan to develop and share websites. If you are writing plugins for software or doing other local development, you can skip this.
GitHub CLI (gh) lets you interact with GitHub directly from the terminal - creating repositories, managing pull requests, triggering deployments, and more.
Do I have it?
Open a terminal and run:
If you see a version number (e.g., gh version 2.40.0), it is already installed.
How do I install it?
Download the Windows installer from https://cli.github.com/
Run the installer with default settings. Admin rights may be required.
Did the installation work?
After installation, close and reopen your terminal, then run:
You can also authenticate with your GitHub account:
Follow the prompts and select GitHub Enterprise Server if using AFRY's GitHub.
Azure CLI (AZ CLI)
Note: AZ CLI is only needed if you plan to deploy websites or other resources to Azure. If you are writing plugins for software or doing other local development, you can skip this.
Azure CLI (az) allows you to manage Azure resources from the command line - deploying web apps, configuring services, and managing cloud infrastructure.
Do I have it?
Open a terminal and run:
If you see a list of version numbers, it is already installed.
How do I install it?
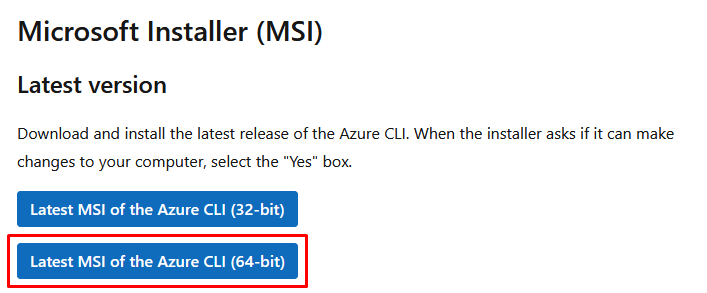
Download the MSI installer from https://learn.microsoft.com/en-us/cli/azure/install-azure-cli-windows?view=azure-cli-latest&pivots=msi
The button to download the installer is found further down on the page. Run the installer with default settings. Admin rights may be required.
Did the installation work?
After installation, close and reopen your terminal, then run:
You can also log in to Azure:
This will open a browser window for authentication using your AFRY account.
Installation Checklist
Use this checklist to verify all software has been installed correctly.
| Software | How to Check | Expected Result | ✓ |
|---|---|---|---|
| VS Code | Open terminal:code --version |
Version number (e.g.,1.85.0) |
☐ |
| GitHub Copilot | Open VS Code → Extensions → Search "GitHub Copilot" | Shows "Installed" | ☐ |
| GitHub Copilot Status | Click GitHub Copilot icon in bottom status bar | Shows "Active" or "Enabled" | ☐ |
| GitHub Copilot Chat | Click chat icon at top or press Ctrl+Alt+I | Chat window opens and responds to questions | ☐ |
| AI Model Access | Open Copilot Chat → Check model dropdown at bottom | Multiple models available (Claude Sonnet 4.5, GPT-4o, etc.) | ☐ |
| Git | git --version |
Version number (e.g.,git version 2.43.0) |
☐ |
| Python | python --version |
Version number (e.g.,Python 3.11.5) |
☐ |
| pip | pip --version |
Version number with Python path | ☐ |
| Node.js | node --version |
Version number (e.g.,v20.10.0) |
☐ |
| npm | npm --version |
Version number (e.g.,10.2.3) |
☐ |
| GH CLI (optional) | gh --version |
Version number (e.g.,gh version 2.40.0) - needed for website deployment |
☐ |
| AZ CLI (optional) | az --version |
List of version numbers - needed for Azure deployment | ☐ |
Troubleshooting
If any command is not recognized:
- Close and reopen your terminal - New installations won't be visible in terminals that were already open
- Check PATH - The program may be installed but not added to your system PATH
- Restart your computer - Some installations require a restart to take effect
- Reinstall - If issues persist, try reinstalling the software