Vibe Coding: Deploy to Azure
🎬 Video
Your app is running locally - but only on your own computer. In this chapter you will publish it to Azure so it gets a real URL that anyone can open in a browser.
Before you start, make sure you have the name of your Azure resource group ready. This is the container in Azure where your app will live - you set it up as part of the prerequisites. If you have not done that yet, go back to 16.2 - Prerequisites first.
What you are deploying to
Your app will be hosted on Azure Static Web Apps - a Microsoft service built specifically for frontend apps like the one you just built. It gives you:
- A public URL your colleagues can open immediately
- Automatic deployments every time you push a change to GitHub
- A free tier with no monthly cost
This last point matters: deploying your app right now costs nothing. The free tier is perfectly fine for a personal project. In a later step (adding AFRY login) you will need to upgrade to the Standard tier, which costs around €8 per month - but that is only when you are ready for it.
What the skill is going to do
The vibe-deploy-app skill handles the entire deployment process. You do not run any commands yourself. Specifically it will:
- Detect your app and confirm the deployment settings with you
- Create an Azure Static Web App resource in your resource group
- Set up a GitHub Actions workflow - an automated pipeline that builds and publishes your app every time you push code to GitHub
- Trigger the first deployment and wait for it to succeed
When it is done, you will have a live URL.
Before you start - two things to have ready
The skill will ask you two questions. Have the answers ready before you begin:
| Question | What to answer |
|---|---|
| App name | Copilot will suggest a name based on your repository name - you can accept it. The format is stapp-yourname-decision-log |
| Resource group | The name of the Azure resource group you created in the prerequisites (for example rg-abc123-01) |
Steps
1. Open Copilot in agent mode
In VS Code, open the Copilot chat panel. Make sure it is set to Agent mode (not Ask or Edit). Select Claude Sonnet 4.6 from the model picker.
You do not need plan mode for this step - go straight to agent mode.
Tell Copilot you are ready to deploy:
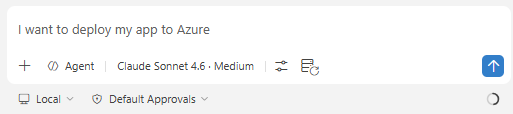 _
_
2. Log in to Azure and GitHub
Copilot will check whether you are already logged in to both Azure and GitHub. If not, it will walk you through the login steps one at a time.
For Azure: it will open a browser window where you sign in with your AFRY account. Follow the prompts and return to VS Code when done.
For GitHub: it will give you a short code and a URL. Open the URL, enter the code, and authorize the connection. Return to VS Code when done.
Once both logins are confirmed, Copilot will continue automatically.
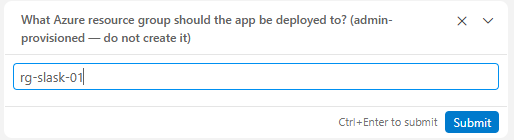
3. Answer the skill's questions
Copilot will show you what it has detected about your app, then ask for the resource group.
| Question | What to answer |
|---|---|
| Resource group | Type the name of your resource group exactly as it was given to you in the prerequisites |
After you answer, Copilot will validate everything before proceeding. If something does not match - for example the resource group does not exist in the subscription - it will tell you clearly what went wrong.
4. Watch the deployment run
Copilot will now:
- (It might initially push the code to GitHub)
- Create the Azure Static Web App resource in your resource group
- Commit a GitHub Actions workflow file to your repository - this means that whenever you send (push) new changes to GitHub, the deployed app will be rebuilt automatically
- Push the code to GitHub, which triggers the first automated build and deployment
- Wait for the workflow run to succeed
This takes a few minutes. You will see progress messages in the chat. You do not need to do anything.
5. Open your live app
When the deployment is complete, Copilot will show you the URL of your live app. Open it in a browser (or ask the agent to show it in the )
It should look exactly like the local version - the same app, now publicly accessible.
6. Check your resources log
After deployment, the skill writes a record of everything it created to a file called docs/resources.md in your repository. Open it and you will see a table like this:
| Field | Value |
|---|---|
| App name | stapp-exercise-decision-log-erik |
| Resource group | rg-slask-01 |
| Subscription | sub-AFRY-VIBE-01-dev |
| Live URL | https://kind-beach-07c432d03.7.azurestaticapps.net |
| GitHub repo | https://github.com/AFRY-X/exercise-decision-log-erik |
| GitHub Actions workflow | .github/workflows/deploy.yml |
| GitHub secret | AZURE_STATIC_WEB_APPS_API_TOKEN |
Your values will be different - the app name, resource group, and URL are specific to your deployment. Keep this file - each subsequent step (authentication, database, AI) will add its own section to it. It becomes a useful reference for what has been set up and where to find things.
What just happened
Your app is now continuously deployed. Every time you push a change to GitHub, the workflow runs automatically and your live app updates. You never need to manually redeploy.
| What | Where |
|---|---|
| Azure resource | Static Web App in your resource group |
| Deployment pipeline | .github/workflows/ in your repository |
| Live URL | Shown by Copilot after deployment, also visible in the Azure portal |
| Cost | €0/month (Free tier) |
You are ready to continue with 16.5 - Add Authentication.