Getting Started with VS Code and GitHub Copilot
This tutorial walks you through opening VS Code, finding the GitHub Copilot chat window, and running your first AI-assisted coding session - from data creation to a working web app.
📹 Prefer to watch? See the video walkthrough.
Prerequisites
- VS Code installed (download here)
- GitHub Copilot extension installed and signed in
- Python installed on your machine (for the example app)
1. Opening a Folder in VS Code
Before you start, open the folder where you want to work.
- Launch VS Code.
- Go to File → Open Folder… (or press
Ctrl+K Ctrl+O). - Select a folder on your computer - for example, a new empty folder called
my-first-copilot-project. - Click Select Folder.
VS Code will now show the folder contents in the Explorer panel on the left.
Tip: Working inside an open folder gives Copilot context about your project - it can read and write files, run commands, and understand your code structure.
2. Opening the GitHub Copilot Chat Window
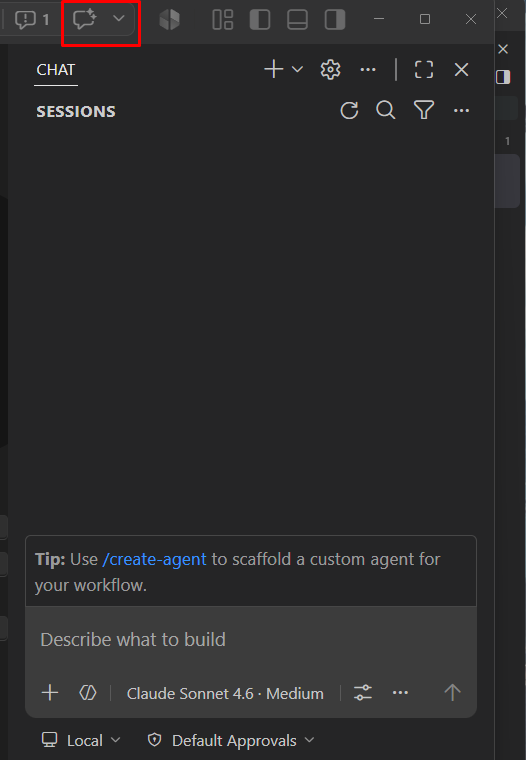
- If the window is not open, you can click the Chat icon in the top bar (it looks like a speech bubble).
- The Copilot Chat panel will open on the side of your editor.
3. Selecting an Agent
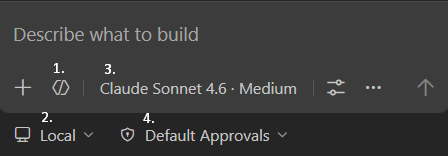
GitHub Copilot Chat is built around agents - each with a specific role. For this tutorial, use the Agent agent, which can take actions on your behalf: creating files, running commands, and building projects end to end.
- At the top of the chat panel, check the Agent Target dropdown and make sure Local [2] is selected. This means the agent runs interactively on your own machine with full access to your workspace.
- In the chat input box, click the agents dropdown [1] (it may show Ask by default).
- Select Agent from the list.
| Agent | Description |
|---|---|
| Agent | Autonomously plans and implements changes across files, runs terminal commands, and invokes tools |
| Plan | Creates a structured, step-by-step implementation plan before writing any code - hands it off to Agent when you're happy with it |
| Ask | Answers questions about your code or general topics without making file changes |
4. Selecting a Model
You can choose which AI model powers your Copilot session. Different models have different strengths.
- In the chat panel, click the model selector [3] (shown near the chat input box).
- Select Claude Sonnet 4.6 (or whichever model you prefer).
Tip: Claude Sonnet 4.6 is a strong general-purpose model well-suited for coding tasks and multi-step agent workflows.
4b. Choosing a Permission Level
When the Agent agent is active, it will ask your permission before running terminal commands or making changes. The permissions picker [4] lets you control how much autonomy it has:
| Level | Behaviour |
|---|---|
| Default Approvals | Only read-only / safe tools run without confirmation - everything else prompts you |
| Bypass Approvals | All tool calls are auto-approved; the agent may still ask clarifying questions |
| Autopilot | Fully autonomous - auto-approves everything and continues until the task is done |
For this tutorial, leave it on Default Approvals so you can see what the agent asks before it acts.
5. Your First Task: Create a Data File
Now let's put Copilot to work. With the Agent agent and Claude Sonnet 4.6 selected, type the following into the chat:
Please create a CSV file which contains the largest cities in the world, including their populations and coordinates
Copilot will:
- Generate a
cities.csvfile with city names, populations, latitudes, and longitudes. - Write the file directly into your open folder.
You can review the file in the Explorer panel once it's created.
6. Your Second Task: Build a Web App
Now ask Copilot to build a visualization on top of that data:
Please create a Python web app which allows me to visualize and edit this data
Copilot will likely:
- Create a Python web application (e.g., using Flask or Streamlit).
- Set up a map or table view to display the city data.
- Add editing functionality so you can update the CSV entries.
- Tell you how to start the app - or you can ask it to start the app for you.
Letting Copilot Start the App
If Copilot gives you manual start instructions, you can simply ask:
Can you start the app for me?
Copilot will run the necessary terminal commands to launch the app and give you a local URL to open in your browser (typically http://localhost:5000 or similar).
7. Understanding Permission Prompts
When running in Agent mode, Copilot will sometimes ask for your permission before taking an action - such as running a terminal command, installing a package, or modifying a file.
Do not blindly accept these prompts. Take a moment to read what Copilot is asking to do. If you are unsure, ask:
What does this command do and why do you need to run it?
Copilot will explain its reasoning. This is a healthy habit that keeps you in control of your own environment.
Summary
You have now:
- Opened a folder in VS Code
- Found and configured the Copilot Chat window
- Selected the Agent agent with the Local target
- Used Copilot to autonomously create a data file and a working web app
Next Steps
- Use the Plan agent to design a feature before building it - review the plan, then hand it off to Agent to implement
- Learn about prompting techniques to get better results
- Try adding a new feature to your cities app - just describe it to Copilot!